Master Juicy Baked Chicken Breast: Your Meal Prep Game Changer in 30 Mins
Tired of dry, rubbery chicken breasts that leave you feeling disappointed and your meal prep containers looking unappetizing? You're not alone. For years, the elusive quest for a truly juicy and tender baked chicken breast seemed like a culinary myth. Many believed pan-frying was the only way to achieve decent results, but often at the cost of uneven cooking and constant hovering over a hot stove. Well, prepare to have your kitchen world rocked! We're here to unveil the fail-proof method for creating perfectly succulent **baked chicken breast** every single time – a method so simple, it’s a total game-changer for busy weeknights and efficient meal prepping, all achievable in just 30 minutes from start to finish.
This isn't just another recipe; it's a blueprint for consistently delicious, versatile chicken that will become a staple in your culinary repertoire. Imagine effortlessly pulling tender, flavorful chicken from the oven, ready to anchor a main dish, top a vibrant salad, fill a hearty sandwich, or become the protein powerhouse in your weekly meal prep. Say goodbye to guesswork and hello to consistently perfect results. If you've ever struggled with lackluster chicken, this comprehensive guide is your pathway to mastering the art of the **baked chicken breast**. And if you want to dive deeper into banishing dry chicken for good, make sure to check out our dedicated guide:
End Dry Chicken: Bake Juicy Breasts with Our Fail-Proof Method.
The Secret Sauce: Why Baking Trumps Other Methods for Juicy Chicken
The fundamental problem with many chicken cooking methods, particularly pan-frying without proper technique, is uneven heat distribution and the temptation to overcook. Chicken breast, being a lean protein, is particularly susceptible to drying out. Baking, however, offers a superior solution.
Firstly, a hot oven provides consistent, all-around heat, ensuring the chicken cooks evenly from edge to edge. Unlike skillet cooking which often leaves some parts more done than others, baking envelops the entire piece of chicken, promoting uniform tenderness. This even cooking eliminates the need for constant flipping or "babysitting," freeing you up to prepare sides or tackle other kitchen tasks. It's a hands-off approach that delivers maximum impact.
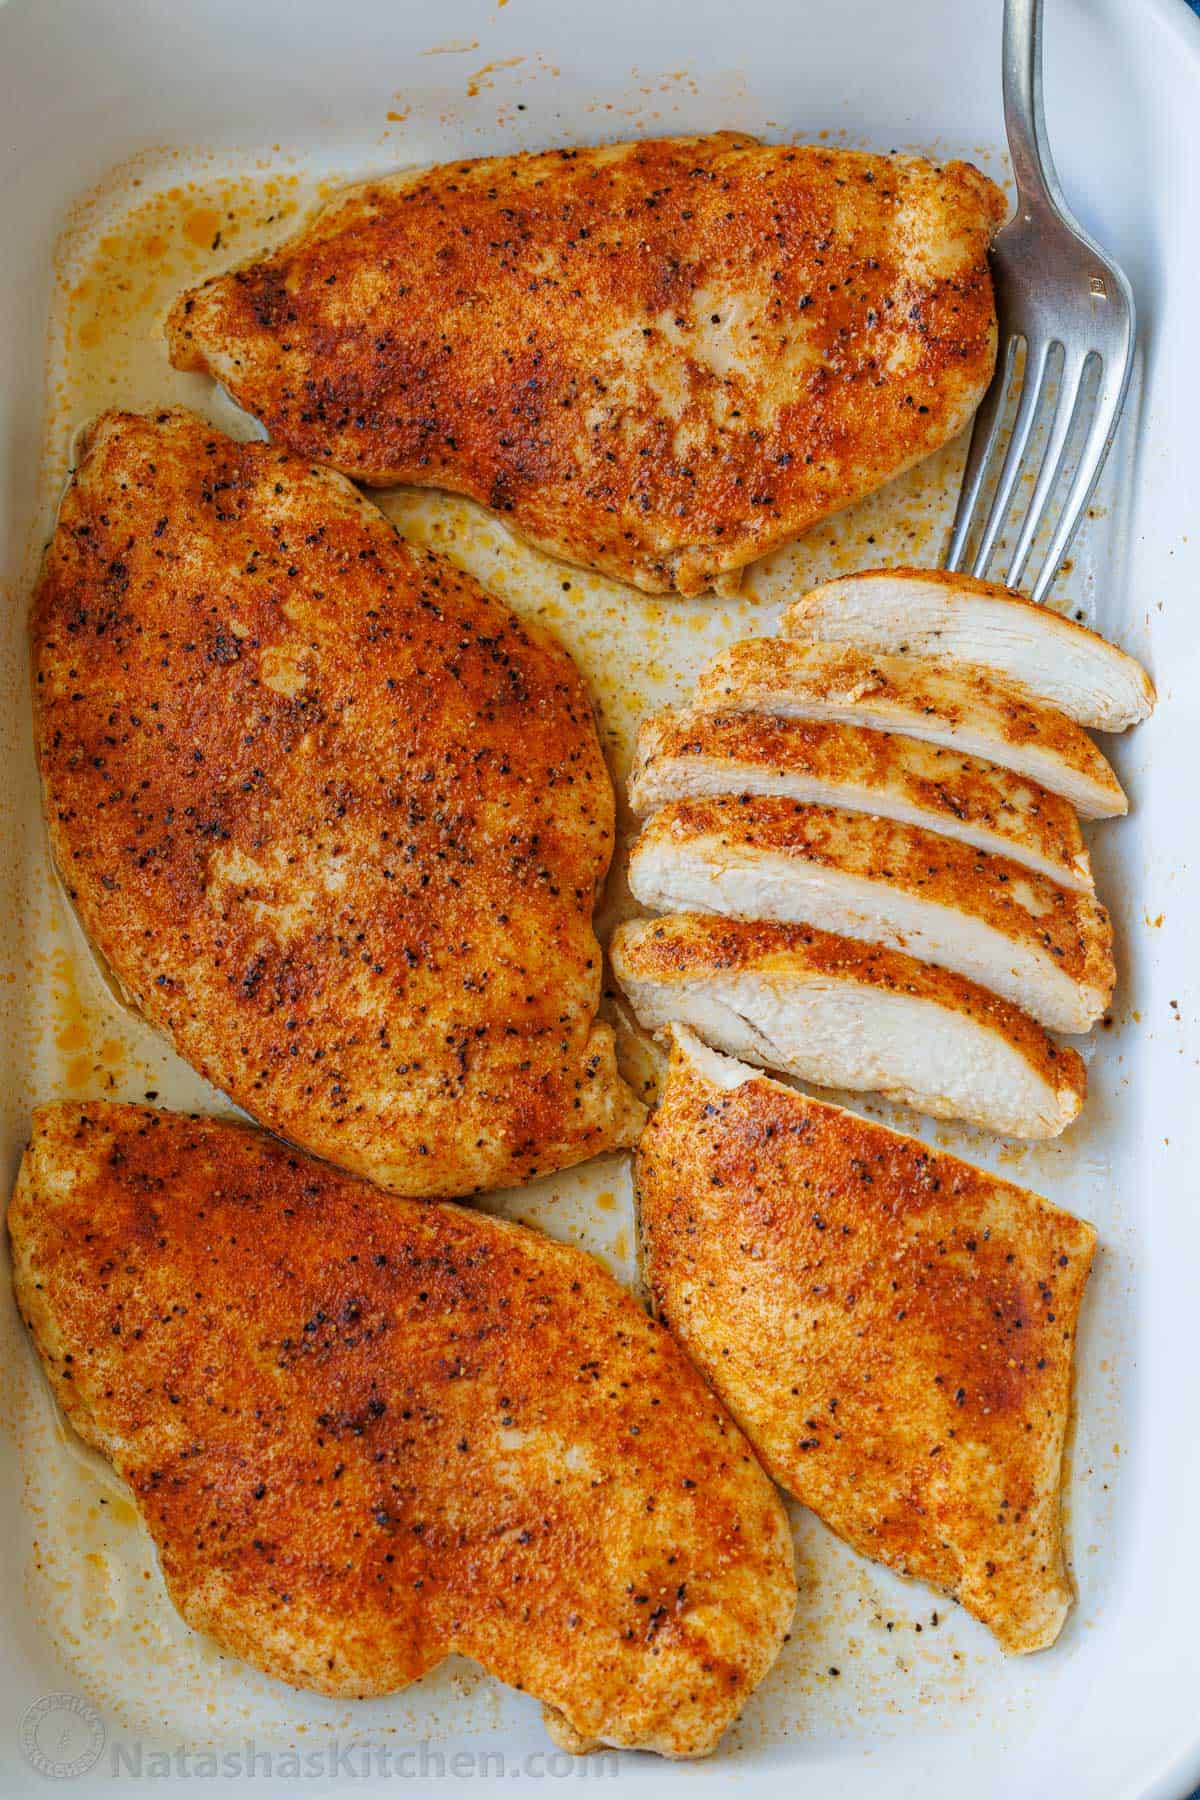
Secondly, our method leverages high heat (specifically 425°F) to quickly cook the chicken while simultaneously creating a delightful outer crust and sealing in those precious natural juices. This quick-cooking at a higher temperature minimizes the time the chicken spends in the oven, drastically reducing the risk of overcooking. The result is a beautifully golden exterior and an incredibly moist, tender interior – a far cry from the dry and rubbery texture you might have experienced before.
Furthermore, chicken breast is an incredibly budget-friendly and versatile protein. It requires minimal trimming and adapts beautifully to countless flavor profiles. From a simple salt and pepper seasoning to bold Mediterranean or spicy Southwest rubs, the possibilities are endless. This makes it an ideal canvas for creativity, ensuring your meal prep never gets boring.
Your Step-by-Step Guide to Perfectly Baked Chicken Breast
Achieving that elusive juicy **baked chicken breast** is simpler than you might think. With just a few key steps and a handful of common ingredients, you'll be well on your way to culinary success.
1.
Pound for Perfection: This is a crucial step often overlooked. Place your boneless, skinless chicken breasts one at a time in a zip-top bag or between two sheets of parchment paper. Using a meat mallet or a heavy rolling pin, gently but firmly pound the chicken to an even thickness, ideally around ¾ to 1 inch. This ensures uniform cooking, prevents thinner edges from drying out while the thicker parts cook, and also tenderizes the meat.
2.
Pat Dry: Remove the pounded chicken breasts and pat them thoroughly dry with paper towels. Excess moisture can steam the chicken rather than allowing it to form a flavorful crust. A dry surface also helps the olive oil and seasonings adhere better.
3.
The Flavor Foundation: Drizzle each chicken breast generously with olive oil. Rub the oil over all sides, ensuring full coverage. The olive oil not only adds flavor and moisture but also helps the seasonings stick and promotes a beautiful golden-brown exterior.
4.
Seasoning Magic: Now for the flavor! While you can customize to your heart's content, a classic, crowd-pleasing blend typically includes:
* 1 teaspoon paprika (for color and mild flavor)
* 1 teaspoon dried oregano
* 1 teaspoon garlic powder
* ½ teaspoon salt (or to taste)
* ¼ teaspoon black pepper (freshly ground, if possible)
Mix these seasonings in a small bowl, then rub the mixture generously over both sides of each olive-oil-coated chicken breast. Don't be shy – this is where the flavor truly comes alive.
5.
Prepare for Baking: Arrange the seasoned chicken breasts in a single layer in a baking dish or on a parchment-lined baking sheet. Ensure there's a little space between each piece for even cooking.
Mastering Cook Times & Temperatures: The Key to Juiciness
This is perhaps the most critical section, as overcooking is the arch-nemesis of a juicy chicken breast. Our fail-proof method relies on precise temperature control and understanding cook times.
*
High Heat, Quick Cook: Preheat your oven to a blazing
425°F (220°C). This high temperature is vital because it cooks the chicken quickly, minimizing the time it has to lose moisture, and helps to create that desirable slightly seared exterior that locks in the juices. For a more in-depth look at this specific method, explore our article:
Bake Tender Chicken: The 425°F Method for Perfect Internal Temp.
*
General Cook Time Guide: The exact cook time will vary based on the size and thickness of your chicken breasts, even after pounding. Here’s a general guideline for **baked chicken breast** at 425°F:
*
Small (5-6 ounce) chicken breasts: 13-16 minutes
*
Medium (8 ounce) chicken breasts: 16-19 minutes
*
Large (11-12 ounce) chicken breasts: 22-26 minutes
*
The Instant-Read Thermometer: Your Best Friend: This is non-negotiable for perfectly cooked, safe, and juicy chicken. The only truly accurate way to determine doneness is by checking the internal temperature with an instant-read meat thermometer inserted into the thickest part of the chicken, avoiding any bones. Chicken is fully cooked and safe to eat when it reaches an internal temperature of
165°F (74°C).
*
Watch Closely: Chicken can go from perfectly done to overcooked in a matter of minutes. Start checking a few minutes before the estimated cook time. When the thermometer registers around 155°F, it's very close – likely just 1-2 more minutes are needed. The chicken will continue to cook slightly (carry-over cooking) as it rests, so pulling it right at 160-162°F can often result in a final perfect 165°F after resting.
Beyond the Oven: Rest, Slice, & Serve for Maximum Tenderness
The journey to perfect **baked chicken breast** doesn't end when you pull it from the oven. These final steps are crucial for ensuring maximum tenderness and flavor.
1.
The Golden Rule of Resting: Once your chicken reaches 165°F, remove it from the oven and let it rest, uncovered, on a cutting board or plate for at least 5 minutes before slicing or serving. This allows the juices, which have migrated to the center of the meat during cooking, to redistribute throughout the entire breast. If you slice it too soon, those precious juices will simply run out onto your plate, leaving you with drier chicken.
2.
Slice Against the Grain: For the most tender bite, always slice your chicken breast against the grain. Look for the muscle fibers running in one direction and slice perpendicularly to them. This shortens the fibers, making the meat easier to chew and more tender.
3.
Versatility for Meal Prep: This recipe is a dream come true for meal prepping. Once cooled, store your sliced or whole **baked chicken breast** in airtight containers in the refrigerator for up to 3-4 days. The possibilities for its use are endless:
*
Salad Topper: Cube it or slice it for Cobb, Caesar, or any green salad.
*
Sandwiches & Wraps: Shred or slice for healthy, flavorful lunches.
*
Pasta & Grain Bowls: Add protein to your favorite pasta dishes or power bowls.
*
Tacos & Quesadillas: Dice it for a lean, flavorful filling.
*
Stir-fries & Soups: Incorporate it into quick weeknight meals.
Consider varying your seasoning blend each week for different flavor profiles – think lemon-herb, spicy chili-lime, or even a simple Italian blend.
Conclusion: Your New Go-To for Baked Chicken Breast
You now possess the knowledge and techniques to consistently create incredibly juicy, tender, and flavorful **baked chicken breast** that will transform your cooking and meal prep routine. No more settling for dry, flavorless chicken; this fail-proof method ensures delicious results in under 30 minutes, every single time. It's easy, versatile, and an absolute game-changer for anyone looking to enjoy healthy, home-cooked meals without the fuss. Embrace the oven, trust your thermometer, and get ready to enjoy the most succulent chicken you've ever made. Your taste buds, and your busy schedule, will thank you.