Unlock Tender Perfection: Why 425°F is Your Secret Weapon for Baked Chicken Breast
Are you tired of serving up dry, rubbery chicken breasts that resemble shoe leather more than a succulent meal? Do you dream of perfectly cooked chicken—tender, juicy, and bursting with flavor—that’s versatile enough for weeknight dinners, meal prep, and everything in between? If so, you’re in the right place. We're about to unveil the fail-proof 425°F method for achieving the ideal internal temperature, transforming your baked chicken breast from a culinary challenge into a consistent triumph.
For years, many home cooks, myself included, swore by skillet-frying as the quickest and easiest path to cooked chicken. While effective, it often comes with uneven cooking and the constant need for "babysitting" at the stovetop. The revelation of the high-heat oven method, specifically baking at 425°F, has been a game-changer. This temperature isn't just a number; it's the sweet spot that delivers even cooking, seals in moisture, and requires minimal hands-on effort. Forget flipping and constant monitoring; with this method, you can achieve incredibly juicy baked chicken breast, perfect for meal prep or any recipe calling for this lean protein.
Chicken breast is a beloved staple for good reason: it's relatively inexpensive, an excellent source of lean protein, and incredibly versatile. It serves as the foundation for countless meals, from elegant main dishes to simple salad toppers, hearty chicken sandwiches, flavorful tacos, and more. The trick, however, has always been to prevent it from drying out. This comprehensive guide will equip you with all the knowledge and techniques you need to consistently produce tender, delicious baked chicken breast, every single time.
Mastering the Prep: From Pounding to Perfect Seasoning
Before your chicken even sees the inside of the oven, proper preparation lays the groundwork for success. These crucial steps ensure even cooking and maximum tenderness:
1. Pound for Even Thickness and Tenderness
One of the most significant factors contributing to unevenly cooked or dry chicken is inconsistent thickness. Chicken breasts often have one end thicker than the other, meaning the thinner part will overcook by the time the thicker part reaches its safe internal temperature. The solution? Pounding your chicken breasts to an even thickness.
- Place chicken breasts one at a time in a zip-top bag or between two sheets of parchment paper.
- Using a meat mallet, the bottom of a heavy skillet, or even a rolling pin, gently but firmly pound the chicken until it’s about ¾ to 1 inch thick across the entire piece. This not only promotes even cooking but also helps tenderize the meat.
2. Pat Dry for Optimal Searing and Flavor
Moisture on the surface of chicken can hinder proper browning and prevent seasonings from adhering well. Always pat your chicken breasts thoroughly dry with paper towels before applying oil or spices. This seemingly small step makes a big difference in achieving that desirable golden crust.
3. Drizzle with Olive Oil for Moisture and Flavor
A light drizzle of olive oil serves multiple purposes. It helps the seasoning stick, contributes to a beautiful golden-brown exterior, and adds an extra layer of moisture and richness. Rub the oil over all sides of the chicken to ensure full coverage.
4. Craft Your Signature Seasoning Rub
While a simple salt and pepper combination is always a good starting point, a well-balanced spice rub elevates your baked chicken breast from good to unforgettable. Our go-to blend for a classic, savory profile includes:
- Paprika: Adds warmth, a subtle sweetness, and a beautiful color.
- Dried Oregano: Offers an aromatic, earthy note.
- Garlic Powder: Provides a pungent, savory depth without the risk of burning fresh garlic.
- Salt & Black Pepper: Essential for seasoning the meat through and through.
Pro Tip: Customizing Your Rub! Don't be afraid to experiment. Consider adding onion powder, a pinch of cayenne for a kick, dried thyme, rosemary, or even a dash of chili powder for a smoky flavor. For an Italian flair, add dried basil and a touch of red pepper flakes. For a Mediterranean twist, sumac or za'atar would be fantastic. Mix your chosen seasonings in a small bowl, then generously rub the mixture over both sides of the oiled chicken.
The Art of Baking: Times, Temperatures, and Tools for Perfection
Now that your chicken breasts are prepped and seasoned, it’s time for the main event: baking. The 425°F oven is the star here, but precise timing and the right tools are your supporting cast.
1. Preheat Your Oven to 425°F
This high temperature is critical. It cooks the chicken quickly, minimizing the time it spends in the oven and thus reducing the chance of drying out. The intense heat also helps to create a flavorful crust while keeping the interior juicy. Always allow your oven to fully preheat before placing the chicken inside.
2. Baking Time Guidelines
The exact cooking time for boneless, skinless chicken breasts will vary depending on their size and thickness, even after pounding. Use these guidelines as a starting point, but always prioritize internal temperature over time:
- Small (5-6 ounce) chicken breasts: 13-16 minutes
- Medium (8 ounce) chicken breasts: 16-19 minutes
- Large (11-12 ounce) chicken breasts: 22-26 minutes
Arrange the chicken breasts in a single layer in a baking dish or on a sheet pan lined with parchment paper for easy cleanup. Ensure there's enough space between each piece for even cooking.
3. The Golden Rule: Use an Instant-Read Thermometer
This is arguably the most important tool in your arsenal for preventing dry chicken. Guessing is the enemy of juicy meat. Chicken is safely cooked when it reaches an internal temperature of 165°F (74°C) in the thickest part of the breast. Insert the thermometer horizontally into the side of the thickest part of the breast, making sure it doesn't touch bone (if present) or go all the way through.
- Watch it closely: Chicken cooks surprisingly fast in the final minutes. If your thermometer reads 155°F, it likely needs only 1-2 more minutes. Remove it from the oven promptly once it hits 165°F. Overcooking, even by a few degrees, is the most common culprit for dry, tough chicken.
Beyond the Oven: Resting, Slicing, and Serving Ideas
Your work isn't done the moment you pull the chicken from the oven. Two final steps ensure maximum tenderness and flavor distribution.
1. The Essential Rest
Once cooked, remove the chicken from the oven and cover it loosely with foil. Let it rest for at least 5-10 minutes before slicing or serving. This resting period is critical:
- Juice Redistribution: As meat cooks, its muscle fibers contract, pushing moisture towards the center. Resting allows these fibers to relax and reabsorb those juices, ensuring that moisture stays within the meat rather than running out onto your cutting board or plate. Skipping this step is a sure way to end up with less juicy chicken.
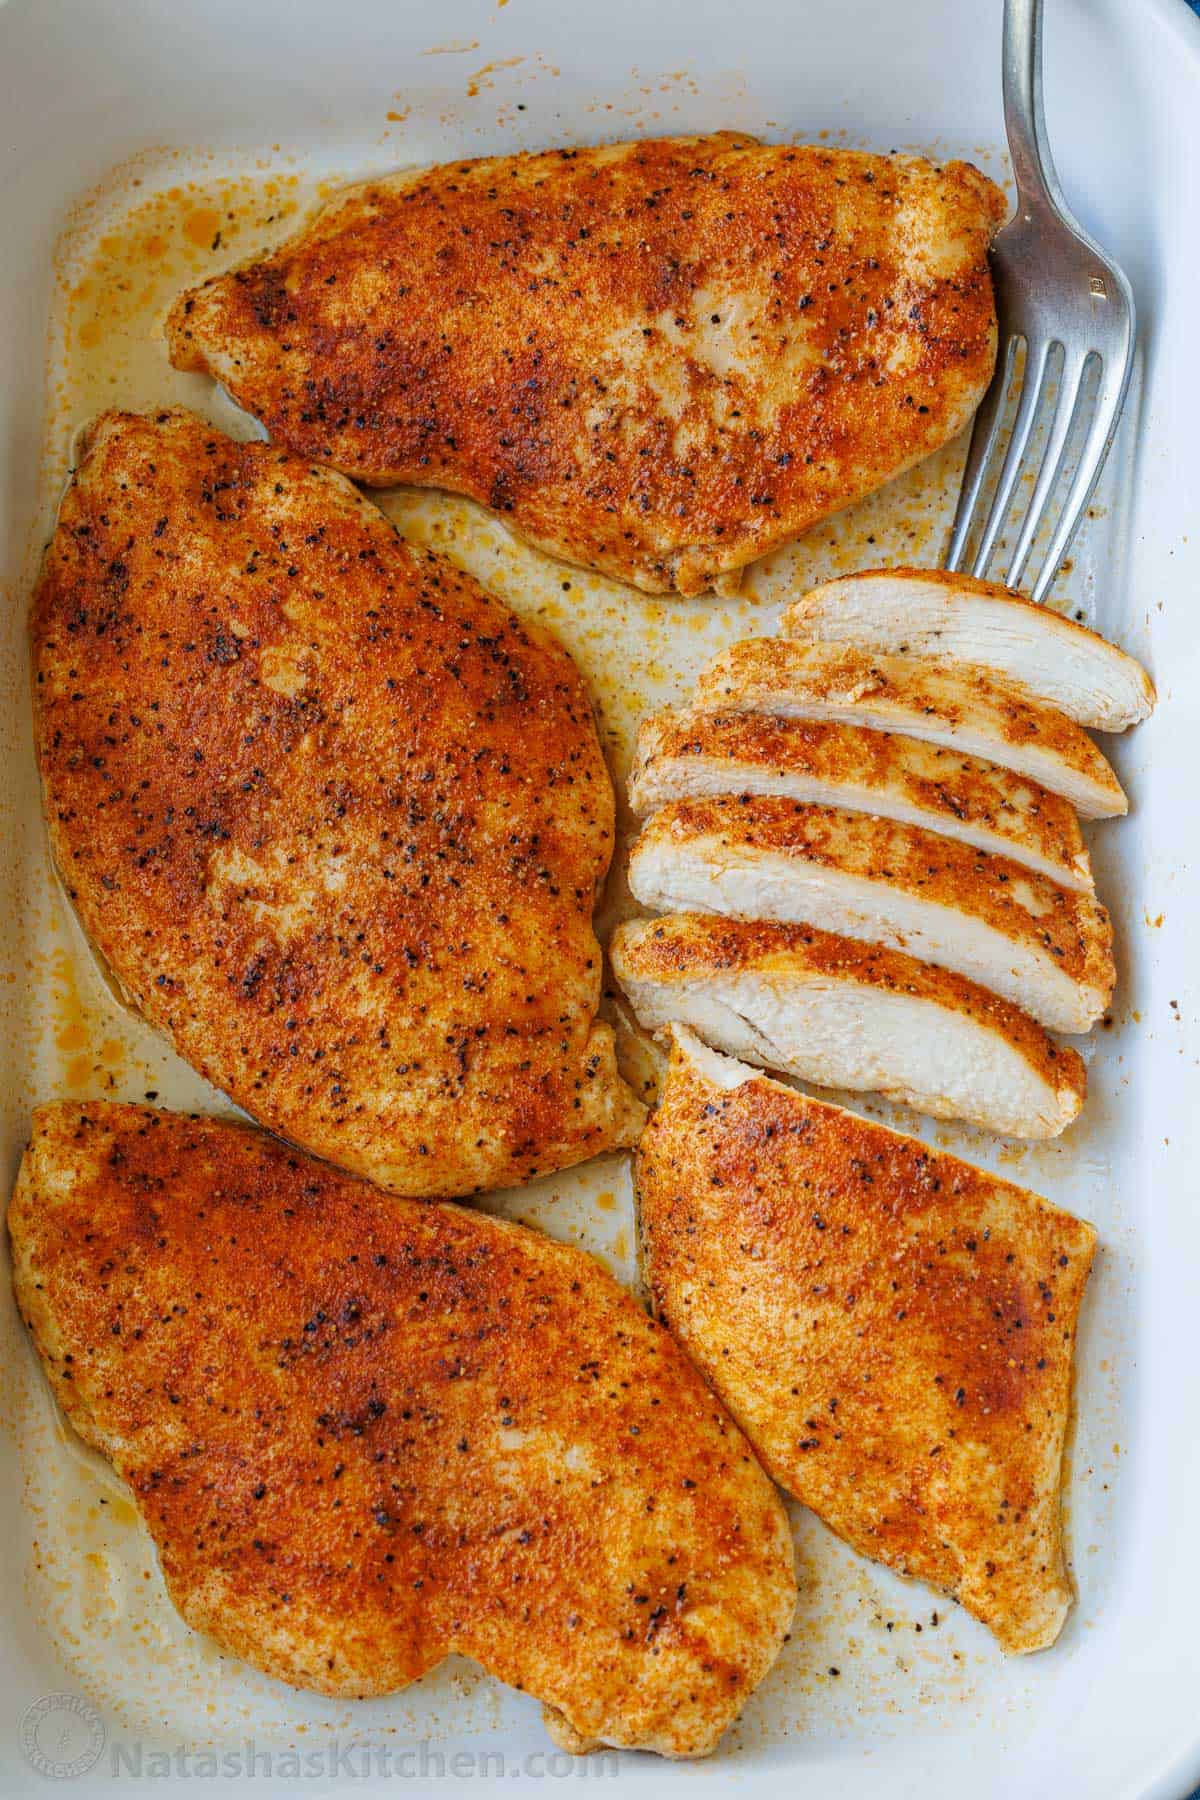
2. Slice Against the Grain for Ultimate Tenderness
For the most tender bites, always slice your chicken against the grain. Look at the chicken breast and identify the direction the muscle fibers run. Then, slice perpendicularly across them. This shortens the fibers, making each bite easier to chew and more tender.
3. Versatile Serving Suggestions
The beauty of perfectly baked chicken breast lies in its versatility. Enjoy it immediately as a main dish with roasted vegetables and a side salad, or incorporate it into a variety of other meals:
- Salads: Slice or dice for Cobb, Caesar, or a vibrant garden salad.
- Sandwiches & Wraps: Pile high for satisfying chicken sandwiches, wraps, or quesadillas.
- Meal Prep: Prepare a batch at the beginning of the week for quick lunches and dinners. It reheats beautifully!
- Pasta Dishes: Cube and toss into your favorite pasta sauces.
- Tacos & Bowls: Shred or slice for flavorful tacos, burritos, or grain bowls.
Conclusion: Your Journey to Juicier Baked Chicken Breast Starts Now
Say goodbye to bland, dry chicken and hello to consistently tender, juicy baked chicken breast. By embracing the 425°F method, focusing on proper preparation like pounding and seasoning, and crucially, monitoring internal temperature with an instant-read thermometer, you're set for success. Remember the importance of resting your chicken and slicing it against the grain to lock in those precious juices.
This method isn't just about cooking chicken; it's about building confidence in your kitchen, simplifying meal prep, and enjoying delicious, wholesome meals any day of the week. So, preheat that oven, grab your spices, and get ready to bake the most perfect, tender chicken breast you've ever tasted!
